
 Paper Is Smudged / Printed Surface Is Scratched
 Paper Is Smudged
 |
 |
|
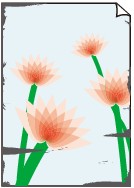
Smudged Edges |
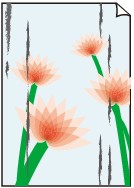
Smudged Surface |

Printed Surface Is Scratched

-
Check1 Check paper and print quality settings.
-
Check2 Check paper type.
Make sure you are using the right paper for what you are printing.
-
Check3 Correct curl before loading paper.
We recommend putting unused paper back into the package and storing it flat.
-
Plain Paper
Turn the paper over and reload it to print on the other side.
Leaving the paper loaded on the rear tray for a long time may cause the paper to curl. In this case, load the paper with the other side facing up. It may resolve the problem.
-
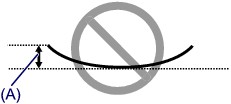
Other Paper such as envelope
If the paper corners curl more than 0.1 inch / 3 mm (A) in height, the paper may smudge or may not feed properly. Follow the instructions below to correct the paper curl.
-
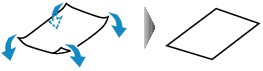
Roll up paper in opposite direction to paper curl as shown below.
-
Check that paper is now flat.
We recommend printing curl-corrected paper one sheet at a time.
-
 Note
Note-
Depending on paper type, the paper may smudge or may not feed properly even if it is not curled inward. Follow the instructions below to curl the paper outward up to 0.1 inch / 3 mm (B) in height before printing. This may improve the print result.
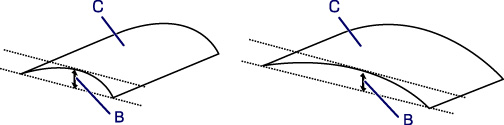
(C) Print side
We recommend feeding paper that has been curled outward one sheet at a time.
-
-
Check4 Set printer to prevent paper abrasion.
Adjusting the setting to prevent paper abrasion will widen the clearance between the print head and the paper. If you notice abrasion even with the media type set correctly to match the paper, set the printer to prevent paper abrasion using the operation panel or the computer.
This may reduce the print speed.
* Once you have finished printing, undo this setting. Otherwise, it will apply to subsequent print jobs.
-
From operation panel
Press the Setup button and select Device settings > Print settings in this order, and then set Prevent abrasion to ON.
-
From computer (Windows)
-
Check that printer is turned on.
-
Open Canon IJ Printer Assistant Tool.
-
Select Select Printer... and select printer you are using from pulldown menu and select OK.
-
Select Custom Settings.
-
Select Prevent paper abrasion check box and click OK.
-
-
-
Check5 If intensity is set high, reduce intensity setting and try printing again.
If you are printing with a high intensity setting on plain paper, the paper may absorb too much ink and become wavy, causing paper abrasion.
-
Printing from your computer (Windows)
Check the intensity setting in the printer driver.
-
Copying
-
-
Check6 Do not print outside recommended printing area.
If you print outside the recommended printing area of your paper, ink may stain the lower edge of the paper.
Resize the document using application software.
-
Check7 Is platen glass or glass of ADF dirty?
Clean the platen glass or the glass of ADF.
Note-
If the glass of ADF is dirty, black streaks appear on the paper as shown below.

-
-
Check8 Is paper feed roller dirty?
Clean paper feed roller.
-
Check9 Is inside of printer dirty?
During duplex printing, ink may stain the inside of the printer, smudging the printout.
Perform bottom plate cleaning to clean inside of printer.
Note-
To prevent staining inside the printer, be sure to set the correct paper size.
-
-
Check10 Set longer ink drying time.
This allows the printed surface to dry, preventing smudges and scratches.
-
For Windows:
-
Check that printer is turned on.
-
Open Canon IJ Printer Assistant Tool.
-
Select Select Printer... and select printer you are using from pulldown menu and select OK.
-
Select Custom Settings.
-
Drag Ink Drying Wait Time slide bar to set the wait time and click OK.
-
Check message and click OK.
-
-
For macOS:
Set the waiting time using Remote UI.
-
