
Printing Photos from a Computer (Mac OS)
This section describes how to print photos with a software application on your computer.
-
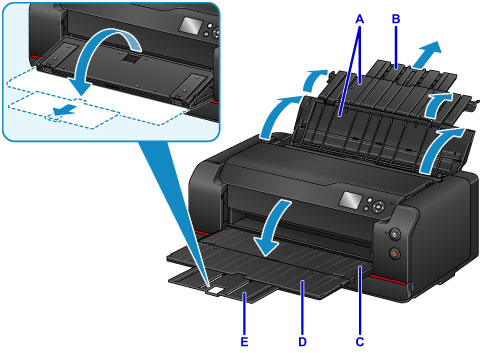
Open the paper support (A) of the top feed, then extend the paper support extension (B).
-
Open the paper output tray (C) gently.
-
Open the output tray extension (D), then pull out the paper output support (E).
-
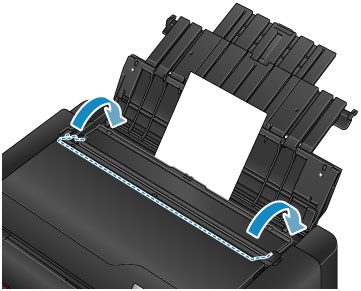
Open the feed slot cover (F).

-
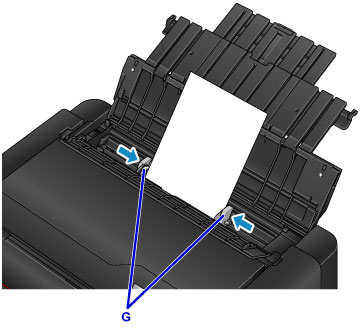
Load paper vertically WITH THE PRINT SIDE FACING YOU.
-
Align the paper guides (G) with the paper width.
-
Close the feed slot cover gently.
The paper information registration screen for the top feed is displayed on the LCD.
-
Select the size and type of paper loaded in the top feed at Page size and Type, select Register, then press the OK button.
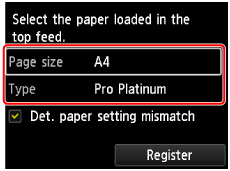
If a message is displayed on the screen, follow the directions in the message to complete registration.
-
Select Print from the software application's menu.
In general, select Print... from the File menu to open the Print dialog.
 Note
Note- For details on the operations of software application you use, refer to the user's manual of your software application.
-
Select your model from the Printer list.
Click Show Details to switch the Setup window to the detailed display.

-
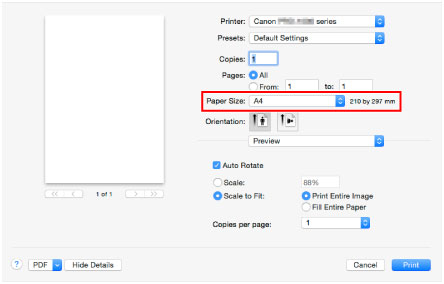
Select the paper size.
For Paper Size, select the paper size to be used.
-
Select Quality & Media from the pop-up menu.

-
Select the media type.
For Media Type, select the same paper type loaded in the printer.
-
Select the paper source.
Select the top feed in which you loaded the paper at Paper Source.

-
After completing the setup, click Print, then execute print.
![]() Note
Note
-
The Print dialog of the printer driver enables you to specify various settings for printing.
- For printing on long-length paper (paper that the length is up to 47.24 inches (1200 mm)), when ink runs out during printing, printing is canceled and paper is ejected. Before start printing, check if enough ink remains.
