
Exporting/Importing Job Logs as File
You can export and import collected job logs as a file. This file can be used if you are replacing the computer used for management, changing the job log destination, or increasing hard disk capacity.
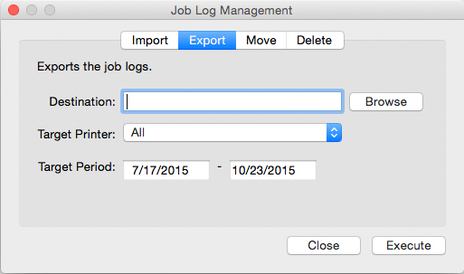
Exporting Job Logs
You can export collected job information with the Export sheet in the Job Log Management dialog box.
-
Open Export sheet in Job Log Management dialog box.
Select Manage Job Logs from the File menu.
Click the Export tab in the Job Log Management dialog box.
-
Specify destination.
Specify the destination for the job logs in Destination.
-
Specify target printer.
Specify the printer for export in Target Printer.
Selecting All includes all managed printers.
 Note
Note-
Printers that were previously registered as managed printers but are no longer registered appear with their MAC addresses.
-
-
Specify target period.
Specify the Target Period.
-
Execute export.
Click the Execute button.
Job logs are saved in the folder specified in Destination.
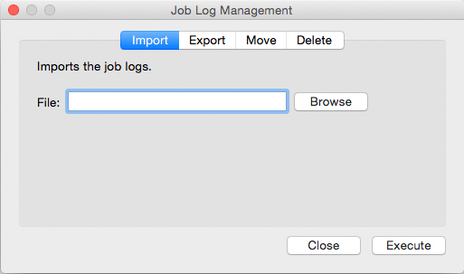
Importing Job Logs
You can import an exported job information file with the Import sheet in the Job Log Management dialog box.
-
Open Import sheet in Job Log Management dialog box.
Select Manage Job Logs from the File menu.
Click the Import tab in the Job Log Management dialog box.
-
Specify file.
Specify the file to be imported in File.
Click the Browse button to open the dialog box for specifying a file.
-
Execute import.
Click the Execute button.
The job log specified in File is imported.
