
Exporting Cost Information to a File
Export cost information from acquired job data to a file in CSV format.
There are two ways to export cost information, as shown below.
-
Export Cost Information of Selected Jobs
-
Export Cost Information at Scheduled Intervals
Cost information that is exported at scheduled intervals is sent by e-mail.
![]() Important
Important
-
The scheduled export and e-mail transmission of cost information requires that resident service be started.
For details on the resident service, see "Resident Service Settings Dialog Box."
Export Cost Information of Selected Jobs
Export cost information to a file in CSV format for jobs selected in the Job Cost list.
-
Select the record to be exported.
Select the record you want to export to a file from the list.
You can select multiple records.
-
Click the
 Export Job Cost Data button.
Or select Export Job Cost Data from Job Cost in the File menu.
Specify the file name and export destination, and then click Save.
Export Cost Information at Scheduled Intervals
Cost information can be exported to a file in CSV format at scheduled intervals.
This applies to all printers for which job costs can be checked in Accounting Manager.
-
Open the Scheduled Export of Cost Data dialog box.
Select Scheduled Export of Cost Data from Job Cost in the File menu.
-
Specify the export criteria.
Specify the Date and Destination, and then click the OK button.
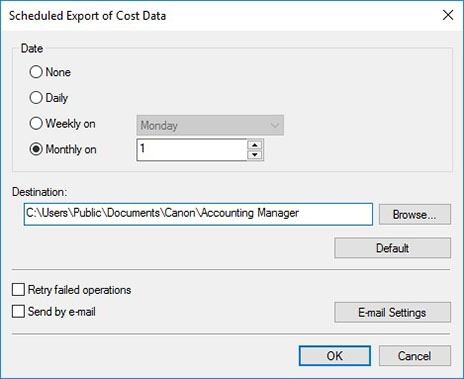
The scheduled export of cost information will be performed using the specified criteria.
 Note
Note- For details on the scheduled export of cost information, see "Scheduled Export of Cost Information Dialog Box."
- You can select the items to export to a file in CSV format. For details, see "CSV Settings Dialog Box."
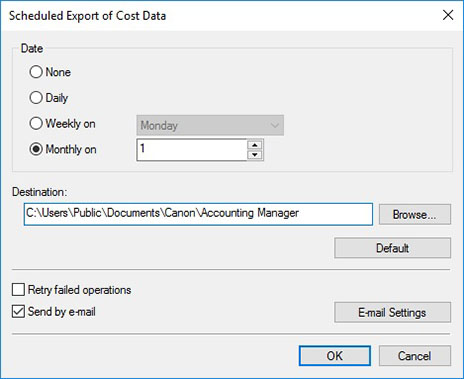
Sending Cost Information by E-mail
Cost information files that are exported at scheduled intervals are sent in a CSV format by e-mail.
The CSV format files that are exported at scheduled intervals are attached to an e-mail and sent to specified addresses.
-
Set the send e-mail function.
Select Send by e-mail in the Scheduled Export of Cost Data dialog box.
-
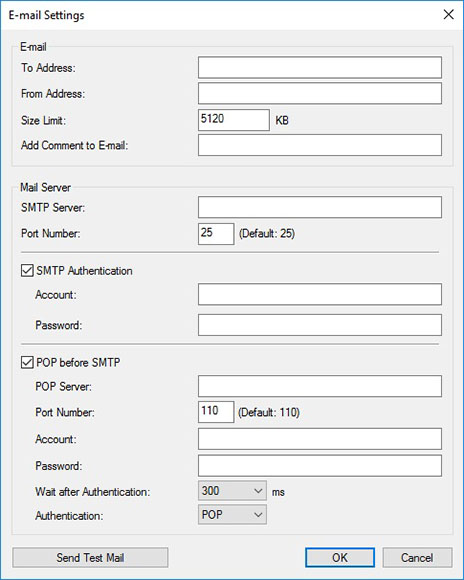
Open E-mail Settings dialog box.
Click the E-mail Settings button.
-
Set the e-mail to send and the e-mail server.
Do the settings to send e-mails.
 Note
Note- For details about e-mail settings, see "E-mail Settings dialog box."
- When you want to confirm that e-mail can be sent correctly using the set conditions, click Send Test Mail. This sends a test e-mail.
When you have completed the settings, click the OK button to close the E-mail Settings dialog box.
-
Click the OK button.
The settings are reflected and the Scheduled Export of Cost Data dialog box closes.
