
Replacing the Maintenance Cartridge
In case of cautions or errors concerning the maintenance cartridge, an error message will appear on the LCD to inform you of the error. Take appropriate action as prompted by the message.
![]() Important
Important
- If the displayed message indicates that the maintenance cartridge is nearly full, promptly obtain a new one. If the maintenance cartridge becomes full, an error message is displayed and the printer stops working until it is replaced with a new one.
![]() Note
Note
-
When purchasing a new maintenance cartridge, order the following cartridge number.
Maintenance Cartridge MC-20
When you need to replace the maintenance cartridge, follow the procedure below.
If an error message and support code 1720 are displayed on the LCD, go to step 5.
-
Make sure that the power is turned on, then display the HOME screen.
If the HOME screen is not displayed, press the HOME button.
-
Select Maintenance on the HOME screen, then press the OK button.
The Maintenance screen will appear.
-
Select Maintenance cartridge info, then press the OK button.
The Maintenance cartridge info screen will appear.
-
Press the OK button.
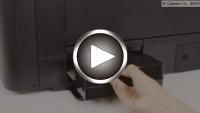
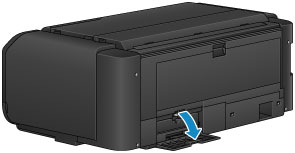
-
Open the maintenance cover.
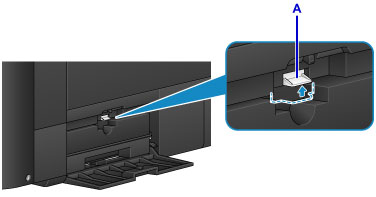
-
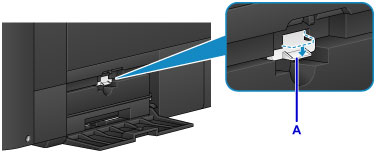
Push up the lock lever (A) with your finger.
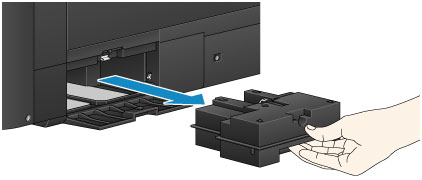
-
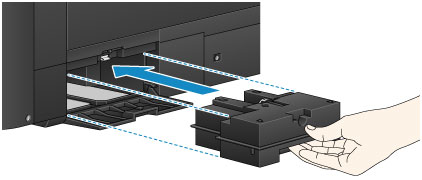
Remove the maintenance cartridge.
-
Insert the new maintenance cartridge straight into the slot.
Align the four corners of the maintenance cartridge with the slot as shown in the figure below.
 Important
-
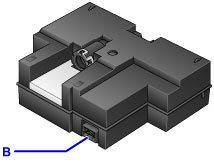
Do not touch the terminal (B) of the maintenance cartridge.
-
-
Push down the lock lever (A) to lock the maintenance cartridge.
-
Close the maintenance cover.
