
Preparing to Transfer the Printer
To protect the internal parts in transit, always follow these steps before transferring the printer to a new location.
For details on packing the printer and installing it after transfer, see "Reinstalling the Printer."
 Important
-
Be sure to contact your Canon dealer before transferring the printer to a new location. Ink may leak and damage the printer if you do not prepare the printer correctly and it is tipped or stood on end in transit.
 Note
Note
-
The maintenance cartridges needs to be replaced when you execute the Prepare to transportation menu. Prepare the maintenance cartridge in advance while referring to the table below. The number of maintenance cartridge required varies depending on the amount remaining in the maintenance cartridge being used.
-
If you can move the printer in a level state using casters or something similar, you do not need to execute Prepare to transportation.
-
Always follow the instructions of the service representative when preparing to transfer the printer.
Prepare to transportation Menu
Usage Examples
Transport and Storage In Low Temperature Environments
Permitted Angle of Inclination
Required Maintenance Cartridges
Move indoors on the same floor
Move indoors by carrying
No
All directions: within 30°
1-3
Move indoors to a different floor
Moving the printer while temporarily tilting it such as when using the stairs
No
All directions: within 90°
1-3
Transport outdoors
Transport By Vehicle
Yes
All directions: within 90°
3
Remove paper
-
Remove the paper.
Selecting Menu for Prepare to transportation
-
If touch screen indicates to replace maintenance cartridge, replace maintenance cartridge.
-
Flick Home screen and tap Maintenance.
The Maintenance screen appears.
-
Tap Prepare to transportation.
-
Select and tap transfer level.
Displays the confirmation screen.
-
Tap Yes.
The printer is now prepared for transfer.
When the preparation is finished, instructions appear on the touch screen.
Remove the ink tanks before packing the printer.
Important-
If consumables must be replaced, a message appears on the touch screen, and preparation is disabled. If the message appears, tap OK and contact your Canon dealer for assistance.
-
Removing Ink Tanks
-
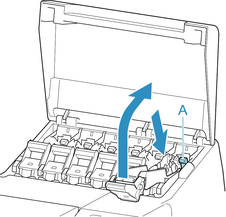
Open left and right ink tank covers to remove all ink tanks.
-
Push down release lever (A) as shown as you gently return all ink tank lock levers to their original positions.
-
Close ink tank covers.
At this point, ink is drawn out from inside the tubes.
A confirmation message will appear when the process is finished.
Important-
Do not remove the maintenance cartridge except when the message indicating replacement is displayed.
If you remove the maintenance cartridge while ink is being removed, the ink may leak out.
-
-
Replace maintenance cartridge currently being used with new maintenance cartridge.
-
Press ON button and turn off printer.
Pack the printer
-
Disconnect power cord and interface cable.
Important-
Turn off the printer before you unplug it. Unplugging the printer before it is off and moving it may damage the printer. If you accidentally unplug the printer, plug it in again, reinstall the ink tanks, and follow this procedure again.
-
-
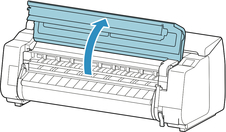
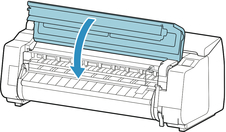
Open top cover.
-
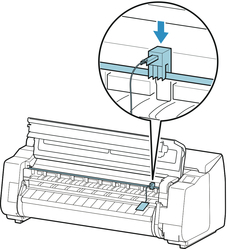
Grasp Belt and insert Belt Stopper into position shown.
 Important
-
Attach the Belt Stopper that was removed and stored after initial installation. Neglecting to attach the Belt Stopper may damage the printer.
-
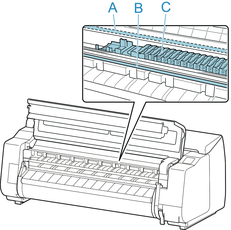
Never touch the linear scale (A), carriage shaft (B), or ink tube stabilizer (C). Touching may damage them.
-
-
Close top cover.
-
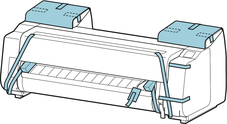
Tape down printer covers to secure them, in the reverse order of tape removal during installation.
-
Remove basket by reversing installation procedure.
-
Remove the Stand by reversing the installation procedure, when it was attached to the printer.
-
Disassemble and repackage the Stand by following the installation procedure in reverse.
-
Repack Roll Holder, holder stopper, and printer in shipping materials, and then package them in shipping box.
