
Printing Photos from a Smartphone/Tablet
This section describes how to print photos with Canon PRINT Inkjet/SELPHY.
For details on how to download Canon PRINT Inkjet/SELPHY, see below.
-
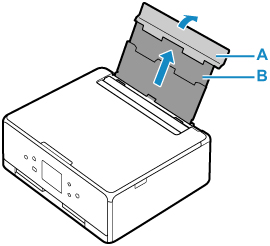
Open rear tray cover (A). Pull straight up and fold back paper support (B).
-
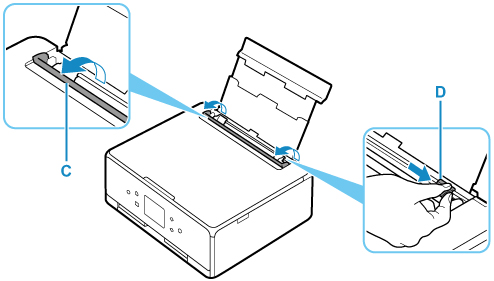
Open the feed slot cover (C).
-
Slide right paper guide (D) to open both paper guides.
-
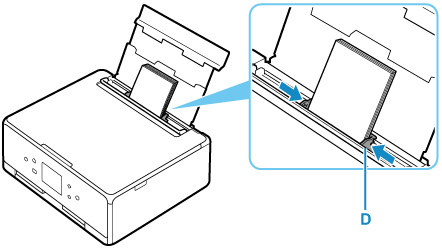
Load photo paper in portrait orientation WITH PRINT SIDE FACING UP.

-
Slide right paper guide (D) to align with both sides of paper stack.
-
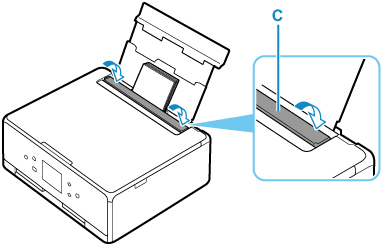
Close feed slot cover (C) gently.
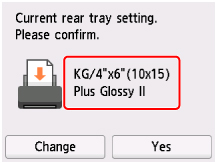
After closing the feed slot cover, the paper setting confirmation screen for the rear tray appears on the touch screen.
-
If page size and media type on touch screen match size and type of paper loaded in rear tray, select Yes.
If not, select Change to change the settings in accordance with the size and type of the loaded paper.
-
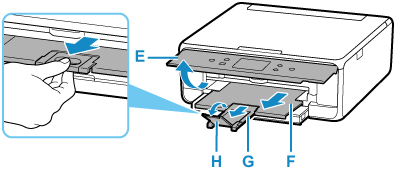
Open operation panel (E), pull out paper output tray (F) and paper output support (G), and then open output tray extension (H).
Be sure to open the operation panel before printing. If the operation panel is close, the printer does not start printing.
-
Start
 (Canon PRINT Inkjet/SELPHY) from your smartphone/tablet.
 -
Select Photo Print on Canon PRINT Inkjet/SELPHY.
The list of photos saved on your smartphone/tablet is displayed.
-
Select a photo.
You can also select multiple photos at once.
-
Specify the number of copies, paper size, etc.
-
Select Print.
