
Adjusting the Tones of Black and White Photos
When printing a black and white image, you can specify a tone to adjust its color tone. You can also make a fine adjustment to the color tone.
| (1) | (2) | (3) |
 |
 |
 |
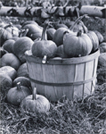
- (1) Cool Tone: A cool bluish tone
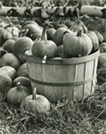
- (2) Black and White: A tone that looks like an achromatic color
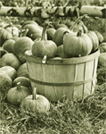
- (3) Warm Tone: A warm yellowish tone
![]() Important
Important
- The results of adjustments in Print Studio Pro will only be reflected in the printed materials and not in the image data.
-
Make sure that the images you want to print are displayed in the Thumbnails area at the bottom left of the screen.
-
Select the Print Black and White Photo checkbox in Print Settings.
-
Select a black and white tone in Correction.
Select a tone from Cool Tone, Black and White and Warm Tone.
 Note
Note-
In the black and white color tone adjustment space, you can make a fine adjustment to the color tone of the image. Click on the color close to what you want.
The black and white tone switches to Custom when you make a fine adjustment in the black and white color tone adjustment space.
 Important
- The black and white color tone adjustment space is not available when using Pro9500 Mark II series or Pro9000 Mark II series. Adjust the color tones using Cyan, Magenta, and Yellow under Color Balance.
-
If the result of printing after adjusting the color tone is different from what is displayed in print preview, perform Pattern Print and adjust the color again, using the pattern as a reference.
-
![]() Note
Note
- When the Darken white areas in the photo checkbox is selected, the highlights in the image will be darkened to make it easier to distinguish the boundary between the image and the paper.
- Refer to "Adjusting the Color Balance, Brightness and Contrast" to change the brightness/contrast.
- See "Settings Area (Correction)" for details on the Settings area (Correction).
