
Switching the Paper Source to Match the Purpose
In this printer, there are two paper sources, a manual feed tray and a rear tray.
You can facilitate printing by selecting a paper source setting that matches your media type or purpose.
The procedure for setting paper source is as follows:
Select Quality & Media from the pop-up menu of the Print Dialog
Select the media type
For Media Type, select the same paper type loaded in the printer.
 Note
Note- When Other Glossy Paper (Wide Margins), Fine Art "Museum Etching", Photo Paper Pro Premium Matte, Other Fine Art Paper 1Other Fine Art Paper 2, or Canvas is selected for Media Type in the Print Dialog, select "XXX (Art Paper Margin 30)" for Paper Size.
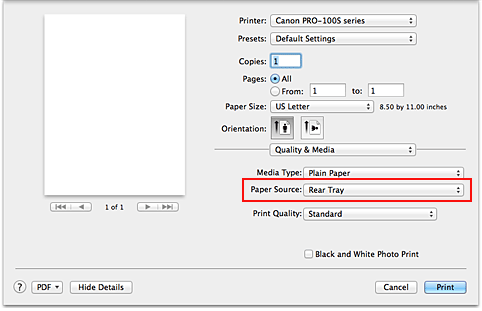
Select the paper source
For Paper Source, select the item below that matches your purpose.
- Manual Feed
-
Paper is supplied from the manual feed tray in the back.
 Important
- When 4 x 6, 5 x 7, A5, JIS B5, L, Postcard or Postcard Double is selected for Paper Size on the Print Dialog, paper cannot be supplied from the manual feed tray in the back.
- When Plain Paper, Glossy Photo Paper, Envelope, Hagaki A, Ink Jet Hagaki, Hagaki K, Hagaki, High Resolution Paper or T-Shirt Transfers is selected from the Media Type menu of the Quality & Media on the pop-up menu in the Print dialog, paper cannot be supplied from the manual feed tray in the back.
- Rear Tray
-
Paper is fed from the rear tray.
Important
- When 14"x17" 36x43cm is selected for Paper Size on the Print Dialog, paper cannot be supplied from the rear tray.
- When Fine Art "Museum Etching", Photo Paper Pro Premium Matte or Canvas is selected from the Media Type menu of the Quality & Media on the pop-up menu in the Print dialog, paper cannot be supplied from the rear tray.
Complete the setup
Click Print.
When you execute print, the printer uses the specified paper source to print the data.
