
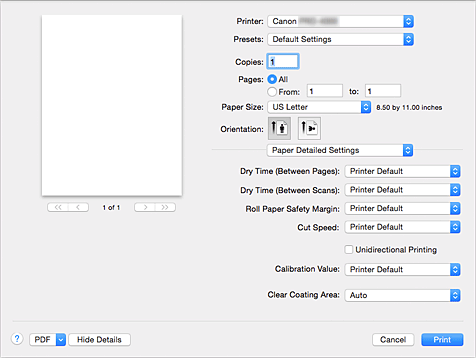
Paper Detailed Settings
Use this dialog box to set detailed print settings that match the media type loaded on the printer.
If the paper becomes stained during printing or if the quality of the print results is less than expected, using these settings may improve the print results.
- Dry Time (Between Pages)
-
Allows you to set the interval between the time each page is printed and the time it exits the printer. Since a certain waiting time is required for the ink to dry before the roll paper is cut, even when, on Page Processing, Automatic Cutting is set to Yes, you can let the document fall into the basket with the ink dried.
The Dry Time (Between Pages) setting is effective only for roll paper.Settings Details Printer Default
Applies the settings configured in the control panel of the printer unit.
None
Documents are ejected immediately after printing is over.
30 seconds / 1 minute / 3 minutes / 5 minutes / 10 minutes / 30 minutes / 60 minutes
After printing is over, documents are ejected after the set time has elapsed.
- Dry Time (Between Scans)
-
Allows you to set the interval between the printing of a line on a page and the printing of the next line. Prevents ink bleeding on a page or uneven coloring during borderless printing.
Settings Details Printer Default
Applies the settings configured in the control panel of the printer unit.
None
Each line is printed immediately after the previous one.
1 second / 3 seconds / 5 seconds / 7 seconds / 9 seconds
After one line has been printed, the next one will be printed after the set time has elapsed.
* Increase the interval depending on the occurrence of bleeding and uneven coloring. - Roll Paper Safety Margin
-
Allows you to specify the length of the white margins on the edges of the paper in order to make even significantly curled paper adsorb to the platen.
Settings Details Printer Default
Applies the settings configured in the control panel of the printer unit.
3mm
Prints in standard-size.
* Choose this setting if there are no particular problems when printing.20mm
Choose this setting in case of chafing against the print head, for example when using significantly curled paper.
- Cut Speed
-
Allows you to select the speed of automatic cutting. Use it to adjust the automatic cutting function when clean cutting is not possible.
Settings Details Printer Default
Applies the settings configured in the control panel of the printer unit.
Fast
Choose this if clean cut surfaces are not possible with the Standard setting.
Standard
Choose this if there are no particular problems with automatic cutting.
Slow
Choose it when using adhesive paper in order to prevent the glue from sticking to the cutter and to avoid a drop in cutting performance.
- Unidirectional Printing
-
Suppresses uneven coloring and line shifts during printing.
To perform unidirectional printing, check this check box. - Calibration Value
- Allows you to apply the results of calibration performed on the printer. To apply the calibration values, select Use Value.
- Clear Coating Area
-
Set the clear coating area.
- Auto
-
The printer automatically sets the areas to be clear-coated and whether clear coating is to be executed.
It may be possible to reduce the ink consumption of the chroma optimizer (CO) or to accelerate the print speed. - Overall
-
The printer clear-coats the entire print area.
If selecting Auto produced unsatisfactory clear coating effects, selecting Overall may improve the results. Important
- You may not be able to select Overall depending on the paper type and print quality.
