
Basic Printing Setup
This section describes settings on the Quick Setup tab used for basic printing.
Basic Printing Setup
Load paper in printer
Select frequently used settings
On the Quick Setup tab, use Commonly Used Settings to select from predefined print settings.
When you select a print setting, the settings for Additional Features, Media Type, and Printer Paper Size automatically switch to the predefined values.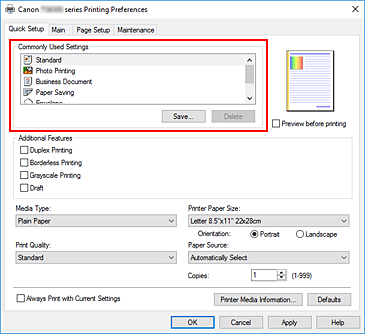
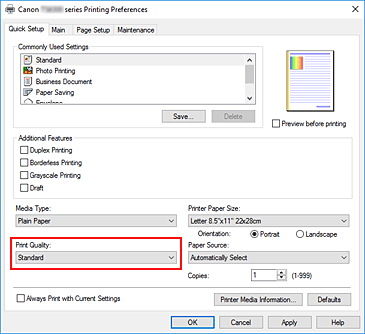
Select print quality
For Print Quality, select from High, Standard, or Draft.
 Important
- The print quality selections will differ depending on which print setting you select.
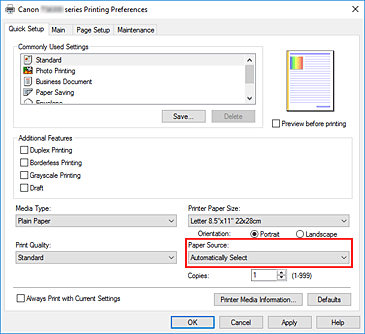
Select paper source
For Paper Source, select Automatically Select, Rear Tray, or Cassette, whichever matches your purpose.
 Important
- The paper source settings that can be selected may differ depending on the paper type and size.
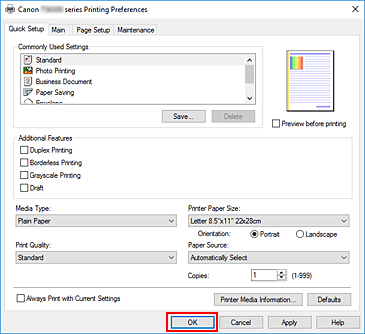
Click OK
The printer will now print using these settings.
![]() Important
Important
- When you select Always Print with Current Settings, the settings on the Quick Setup, Main, and Page Setup tabs are saved, and those settings are used in subsequent printings.
- To register the current settings as a new preset, click Save... under Commonly Used Settings.
![]() Note
Note
- If the paper settings in the printer driver differ from the paper information registered on the printer, an error may occur. For instructions on what to do if an error occurs, see "Paper Settings."
To check the current printer settings or to apply the printer settings to the printer driver, display the Quick Setup tab, click Printer Media Information..., and specify the settings in the dialog box that appears.
For details about the paper information to be registered on the printer, see the following:
Checking Printer Settings and Applying Settings to Printer Driver
Open printer driver setup window
On Quick Setup tab, click Printer Media Information...
The Printer Media Information dialog box appears.
Select Paper Source
From Paper Source, check the setting or select a new paper source.
The current printer settings appear in Media Type and Page Size.Apply settings
To apply the printer settings to the printer driver, click Set.
 Note
Note- If the Supported types on the printer is set to IJ Hagaki, Hagaki K, or Hagaki, or if the Supported sizes on the printer is set to 5"x7"(13x18), click Set to display the dialog box.
Select the media type and paper size that match your purpose, and then click OK. - If the Supported types and the Supported sizes on the printer are not set or are set to Others, Set will be grayed out and cannot be clicked.
- If communication with the printer is disabled, the Printer Media Information... dialog box will not appear or the printer driver will not be able to obtain printer media information.
- If the Supported types on the printer is set to IJ Hagaki, Hagaki K, or Hagaki, or if the Supported sizes on the printer is set to 5"x7"(13x18), click Set to display the dialog box.

