
Scanning Multiple Documents at One Time with ScanGear (Scanner Driver)
You can scan two or more photos (small documents) on the Platen at one time on the Basic Mode tab and Advanced Mode tab.
This section explains how to scan multiple documents from the Basic Mode tab.
![]() Important
Important
- To scan multiple documents as a single image, scan in whole image view.
-
The following types of documents may not be cropped correctly. In that case, adjust the cropping frames (scan areas) in whole image view and scan.
- Photos with a whitish background
- Documents printed on white paper, hand-written text, business cards, and other unclear documents
- Thin documents
- Thick documents
-
The following types of documents cannot be scanned correctly.
- Documents smaller than 1.2 inches (3 cm) square
- Photos that have been cut to various shapes
![]() Note
Note
- You can also scan multiple documents at one time from the Advanced Mode tab. Use the Advanced Mode tab to make advanced scan settings such as the color mode, output resolution, image brightness, and color tone.
-
Refer to the corresponding sections below for details on the Basic Mode tab and Advanced Mode tab.
-
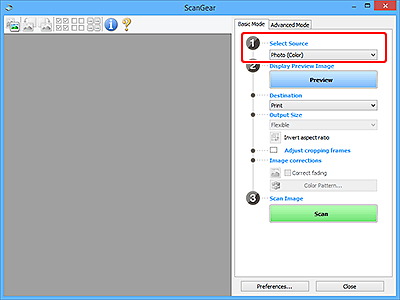
Place document on Platen, and then start ScanGear (scanner driver).
-
Set Select Source according to the document placed on the Platen.
-
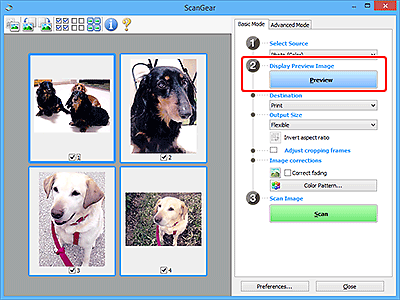
Click Preview.
Thumbnails of the preview images appear in the Preview area. Cropping frames are specified automatically according to the document size.
-
Set Destination.
-
Set Output Size according to purpose.
-
Adjust the cropping frames and set Image corrections as required.
 Note
Note- You can correct each image separately. Select the frame you want to correct.
-
In thumbnail view, you can only create one cropping frame per image. To create multiple cropping frames in an image, scan in whole image view.
-
Select the images you want to scan.
Select the checkboxes of the images you want to scan.
-
Click Scan.
Scanning Multiple Documents in Whole Image View
Follow these steps if thumbnails are not displayed correctly when previewed or if you want to scan multiple documents as a single image.
![]() Note
Note
- Positions of slanted documents are not corrected in whole image view.
-
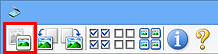
After previewing images, click
 (Thumbnail) on the Toolbar.
Switch to whole image view.
 Note
Note- When the whole image is displayed, the icon changes to
 (Whole Image).
- When the whole image is displayed, the icon changes to
-
Set Destination.
-
Set Output Size according to purpose.
Invert aspect ratio will be enabled when Output Size is set to anything but Flexible. Click this button to rotate the cropping frame. Click again to return it to the original orientation.
-
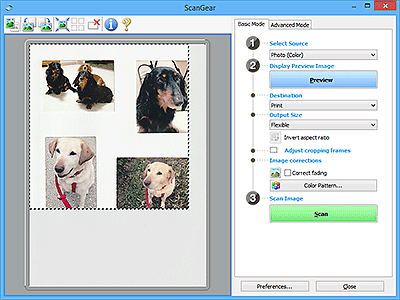
Adjust the cropping frames.
Adjust the size and position of the cropping frames on the preview image. You can also create two or more cropping frames.
If an area is not specified, the document will be scanned at the document size (Auto Crop). If an area is specified, only the portion in the specified area will be scanned.
-
Set Image corrections as needed.
-
Click Scan.
Areas framed by broken lines are scanned.
![]() Note
Note
- How ScanGear behaves after scanning is complete can be set from Status of ScanGear dialog after scanning on the Scan tab of the Preferences dialog box.
