
Settings (Attach to E-mail (Photo)) Dialog Box
Click Attach to E-mail (Photo) on the  (Scanning from the Operation Panel) tab to display the Settings (Attach to E-mail (Photo)) dialog box.
In the Settings (Attach to E-mail (Photo)) dialog box, you can specify how to respond when attaching images to an e-mail as photos after scanning them from the operation panel.
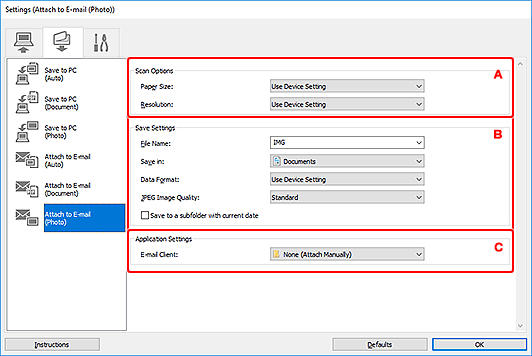
A: Scan Options Area
- Paper Size
- Set from the operation panel.
- Resolution
- Set from the operation panel.
B: Save Settings Area
- File Name
-
Enter the file name of the image to be saved. When you save a file, the date and four digits are appended to the set file name in the "_20XX0101_0001" format.
 Note
Note- When you select the Save to a subfolder with current date checkbox, the date and four digits are appended to the set file name.
- Save in
-
Displays the folder in which to save the scanned images. To add a folder, select Add... from the pull-down menu, then click Add in the displayed Select Destination Folder dialog box and specify the destination folder.
The default save folders are as follows.
-
Windows 10/Windows 8.1:
Documents folder
-
Windows 7:
My Documents folder
-
- Data Format
- Set from the operation panel.
- JPEG Image Quality
- You can specify the image quality of JPEG files.
- Save to a subfolder with current date
-
Select this checkbox to create a current date folder in the folder specified in Save in and save scanned images in it. The folder will be created with a name such as "20XX_01_01" (Year_Month_Date).
If this checkbox is not selected, files are saved directly in the folder specified in Save in.
C: Application Settings Area
- E-mail Client
-
Specify the e-mail client to use for attaching scanned images.
You can specify the e-mail client you want to start from the pull-down menu.
![]() Note
Note
- To add an e-mail client to the pull-down menu, select Add... from the pull-down menu, then click Add in the displayed Select Application dialog box and specify the e-mail client.
- Instructions
- Opens this guide.
- Defaults
- You can restore the settings in the displayed screen to the default settings.
