Application Management
This section explains how to add, delete, and sort apps.
 Important
- Select how to manage allows you to change which users can use this service.
For details, see "Canon Inkjet Cloud Printing Center window".
Add apps
You can add your favorite apps to the printer.
Follow the steps described below to add apps.
-
Display the main screen of the Cloud
You can display the main screen of the Cloud by one of the following options.
- From the printer screen, select
 ->
->  Cloud applications.
 - From the printer screen, select
 Cloud or
  .
.
- From the printer screen, select
-
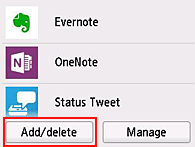
On the cloud's Main screen, select Add/delete
-
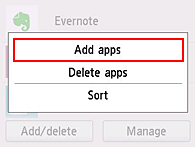
Select Add apps
-
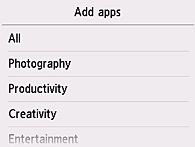
Select the category of the app
-
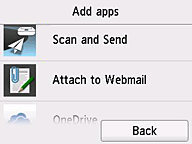
From the displayed apps list, select the app that you want to register
-
Select Register
The registration is completed and the app is added to the apps list on the main screen.
To register another app, repeat the procedure from step 5.
To end the app registration, select Back and return to the cloud's Main screen.
 Important
- Some apps may require a linked app account before you can use the app. If this is the case, set up an account beforehand.
Delete apps
You can delete unnecessary apps from the apps list.
Follow the steps described below to delete apps.
-
Display the main screen of the Cloud
You can display the main screen of the Cloud by one of the following options.
- From the printer screen, select
 ->
->  Cloud applications.
 - From the printer screen, select
 Cloud or
  .
.
- From the printer screen, select
-
On the cloud's Main screen, select Add/delete

-
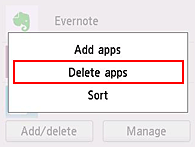
Select Delete apps
-
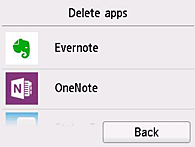
From the apps list, select the app that you want to delete
 Note
Note- Description of displayed icons
 : Cannot be used because it is not yet released or does not support your region, model, or language.
- Description of displayed icons
-
Select Delete
When the deletion is finished, the app will be deleted from the apps list on the main screen.
To delete another app, repeat the procedure from step 4.
To end the app deletion, select Back and return to the cloud's Main screen.
 Note
Note
- Add apps allows you to re-register deleted apps.
Sort apps
You can sort apps displayed on the apps list.
Follow the steps described below to sort apps.
-
Display the main screen of the Cloud
You can display the main screen of the Cloud by one of the following options.
- From the printer screen, select
 ->
->  Cloud applications.
 - From the printer screen, select
 Cloud or
  .
.
- From the printer screen, select
-
On the cloud's Main screen, select Add/delete

-
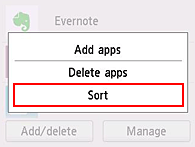
Select Sort
-
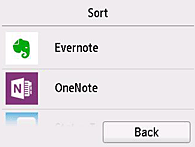
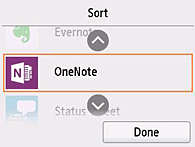
On the apps list, select the app that you want to sort
 Note
Note- Description of displayed icons
 : Cannot be used because it is not yet released or does not support your region, model, or language.
 : This is the app on which the schedule is set.
- Description of displayed icons
-
Use
 /
/  buttons to move the app
-
Select Done
Sorting is complete.
To continue the sorting, repeat the procedure from step 4.
To end the sorting, select Back and return to the cloud's Main screen.

