
Preparations for Printing with Google Cloud Print
To print with Google Cloud Print, you need to get Google account and register the printer with Google Cloud Print in advance.
If you already have Google account, register the printer.
Getting Google Account
First, get your Google account in order to register the printer with Google Cloud Print.
Access to Google Cloud Print with the web browser on the computer or the mobile device, then register the required information.
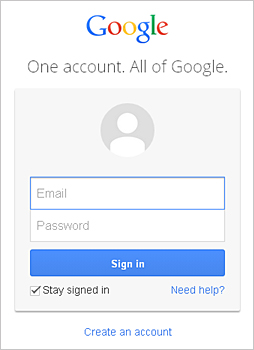
* The screen above may change without prior notice.
Registering the Printer with Google Cloud Print
Register the printer with Google Cloud Print.
If the firmware version is Ver. 2.010 or later, registration is possible from Google Chrome on your computer.
For earlier versions, or when using a smartphone or tablet, register the information directly from the printer.
![]() Important
Important
- For instructions on checking the firmware version and updating the firmware, refer to "Firmware Update".
- After you update the firmware, you must re-register the printer even if it was already registered.
- When you register a printer, the printer must be connected to the LAN and the LAN environment must be connected to the Internet. Note that the customer is responsible for all Internet connection fees.
- When the printer owner changes, delete the printer registration from Google Cloud Print.
Registration from Computer
-
Start the Google Chrome browser on your computer. Then from
 (Chrome menu), select Sign in to Chrome..., and log in to your Google account
 -
From
(Chrome menu), select Settings -
Click Show advanced settings... to display the information. Then for Google Cloud Print, select Manage
-
Select Add printers for the printer to be added
-
When the confirmation message for registering the printer appears, select OK
Printer registration is complete.
Registration from the Printer
The authentication procedure using the web browser on the computer or the mobile device is required in the process of registering. Because the authentication URL is printed from printer when the authentication process is performed, prepare A4 size or Letter size or Legal size plain paper.
-
Make sure that the printer is turned on
-
From the Home screen, select Setup
-
Select Web service setup -> Connection setup -> Google Cloud Print setup -> Register with Google Cloud Print
 Note
Note- If you have already registered the printer with Google Cloud Print, the confirmation message to re-register the printer is displayed.
-
When the confirmation screen to register the printer is displayed, select Yes
-
Select a display language on the print setting screen of Google Cloud Print
The confirmation message to print the authentication URL is displayed.
-
Load A4 size or Letter size or Legal size plain paper, then select OK
The authentication URL is printed.
-
Ensure that the authentication URL is printed, select Yes
-
Perform the authentication process using the web browser on the computer or the mobile device
Access to the URL using the web browser on the computer or the mobile device and perform the authentication process following the on-screen instructions.
Note- Perform the authentication process with your Google account which you have gotten in advance.
-
When the message that the registration is complete is displayed on the LCD of the printer, select OK
When authentication process is complete properly, the registration items are displayed. When authentication process is complete, you can print the data with Google Cloud Print.
When authentication process is not complete properly and the error message is displayed, select OK. When the confirmation message to print the authentication URL is displayed, print the authentication URL, then perform the authentication process on the computer again.
Deleting the Printer from Google Cloud Print
To change the printer owner or to re-register the printer, first delete the printer from Google Cloud Print.
If the firmware version is Ver. 2.010 or later, the printer can be deleted from Google Chrome on your computer.
For earlier versions, or when using a smartphone or tablet, delete the information directly from the printer.
Deletion from Computer
-
Start the Google Chrome browser on your computer. Then from
(Chrome menu), select Sign in to Chrome..., and log in to your Google account -
From
(Chrome menu), select Settings -
Click Show advanced settings... to display the information. Then for Google Cloud Print, select Manage
-
Select Delete for the printer to be deleted
-
When the confirmation message for deleting the printer appears, select OK
Deletion from the Printer
-
Make sure that the printer is turned on
-
From the Home screen, select Setup
-
Select Web service setup -> Connection setup -> Google Cloud Print setup -> Delete from Google Cloud Print
-
When the confirmation screen to delete the printer is displayed, select Yes


